5.11 Canceling cards
You can cancel cards that are present, cancel cards that are not present, and enable or disable cards temporarily.
5.11.1 Enabling or disabling cards
You can enable or disable a card temporarily using the Enable / Disable Card workflow. You can enable or disable the card whether the card is present or not.
Note: As an alternative, you can use the Enable Device and Disable Device options in the MyID Operator Client. See the Enabling and disabling devices section in the MyID Operator Client guide for details.
To enable or disable a card:
-
From the Cards category, click Enable / Disable Card.

-
If the card is present, insert it into an available card reader.
If the card is not present, click Search then use the Find Person screen to find the cardholder, then (if the cardholder has more than one card) select the card you want to enable or disable.

-
Select a reason and type the details for canceling the card, then click Continue.
See section 6.5, Certificate reasons for details.

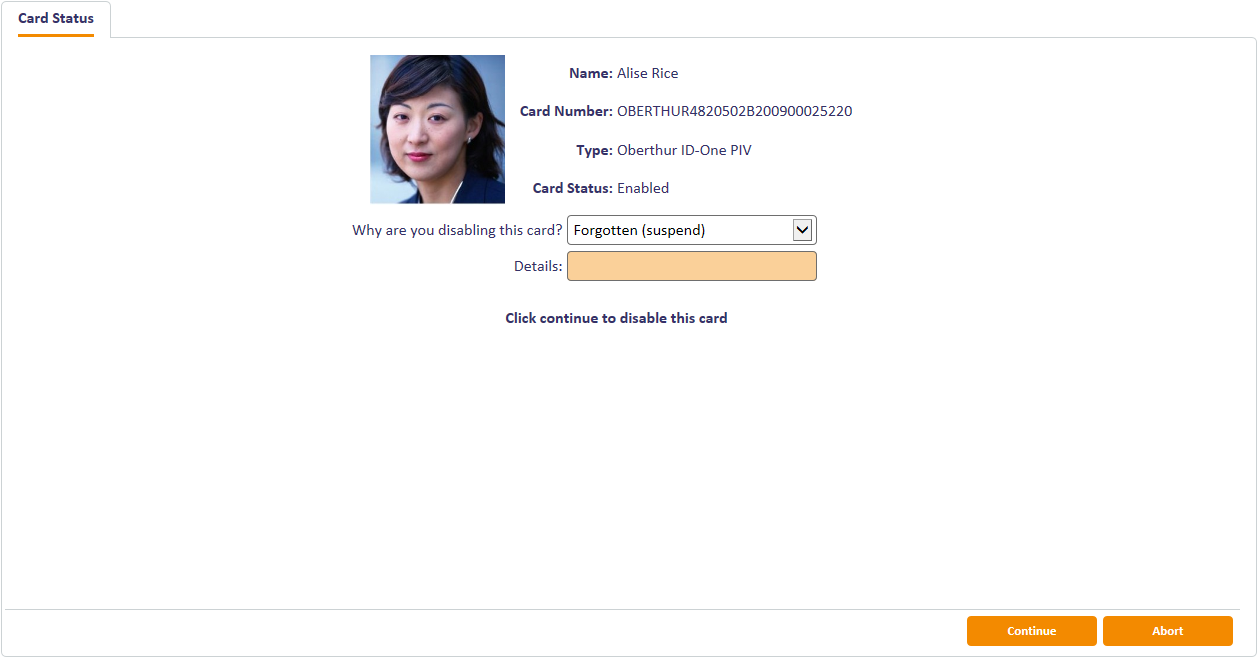
Note: If a card with existing suspended certificates is disabled, all active certificates on the card are suspended. If that card is then re-enabled, all certificates on the card (including those which were originally suspended) are enabled.
For example, a card has two certificates: one issued and the other suspended. If that card is disabled, the issued certificate is suspended. When the card is re enabled, both certificates are unsuspended.
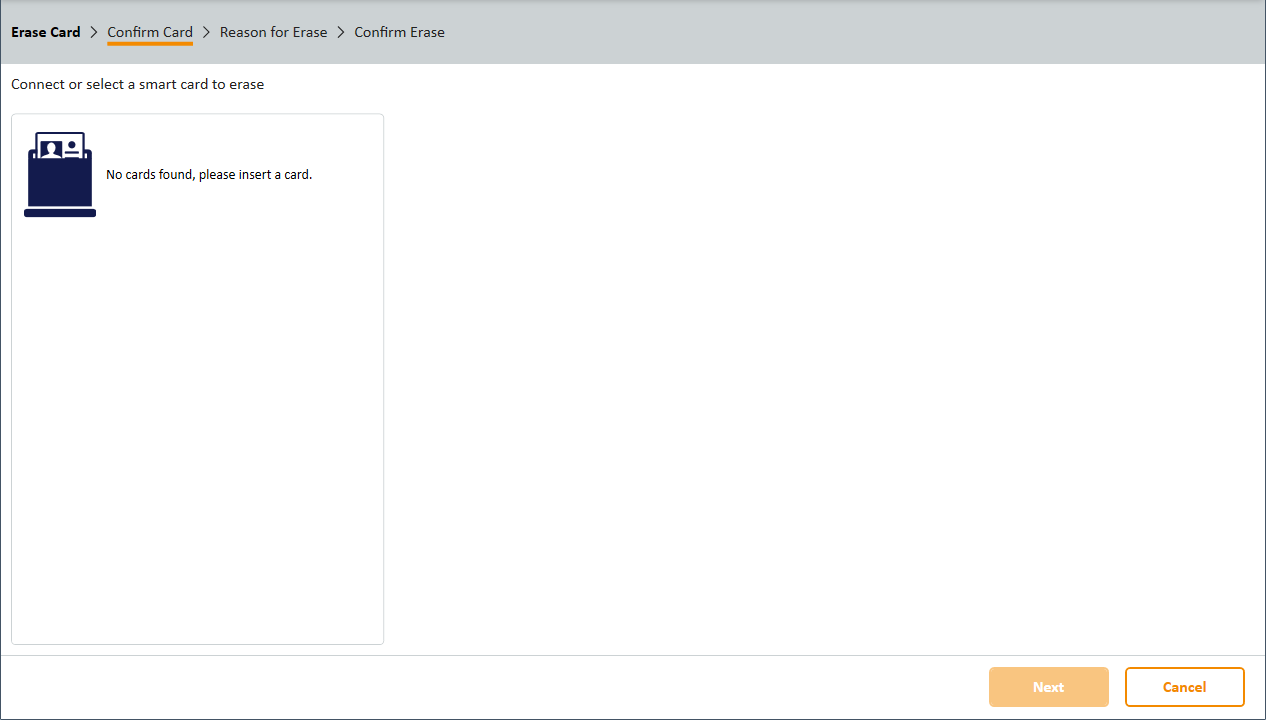
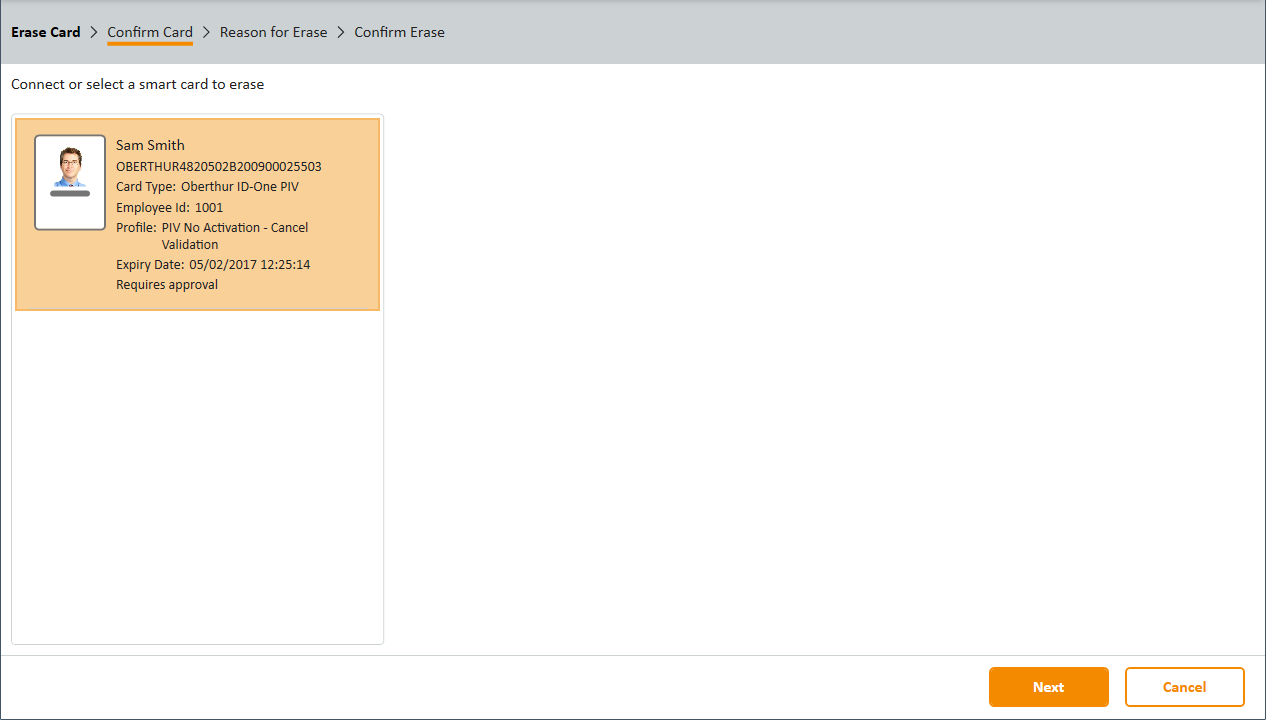
5.11.2 Erasing a card
When you erase a card, MyID removes its details from the database, revokes and removes any certificates stored on it and – as much as possible – returns the card to its original state. You can erase smart cards that are physically present
Note: If your card is contactless only, or it is not present, you cannot use the Erase Card workflow to cancel it. Instead, use the Cancel Credential workflow. See section 5.11.3, Canceling a credential.
Note: You cannot erase your own cards.
To erase a card:
-
From the Cards category, select Erase Card.

-
Insert the card you want to cancel and select it from the list.

-
Click Next.

-
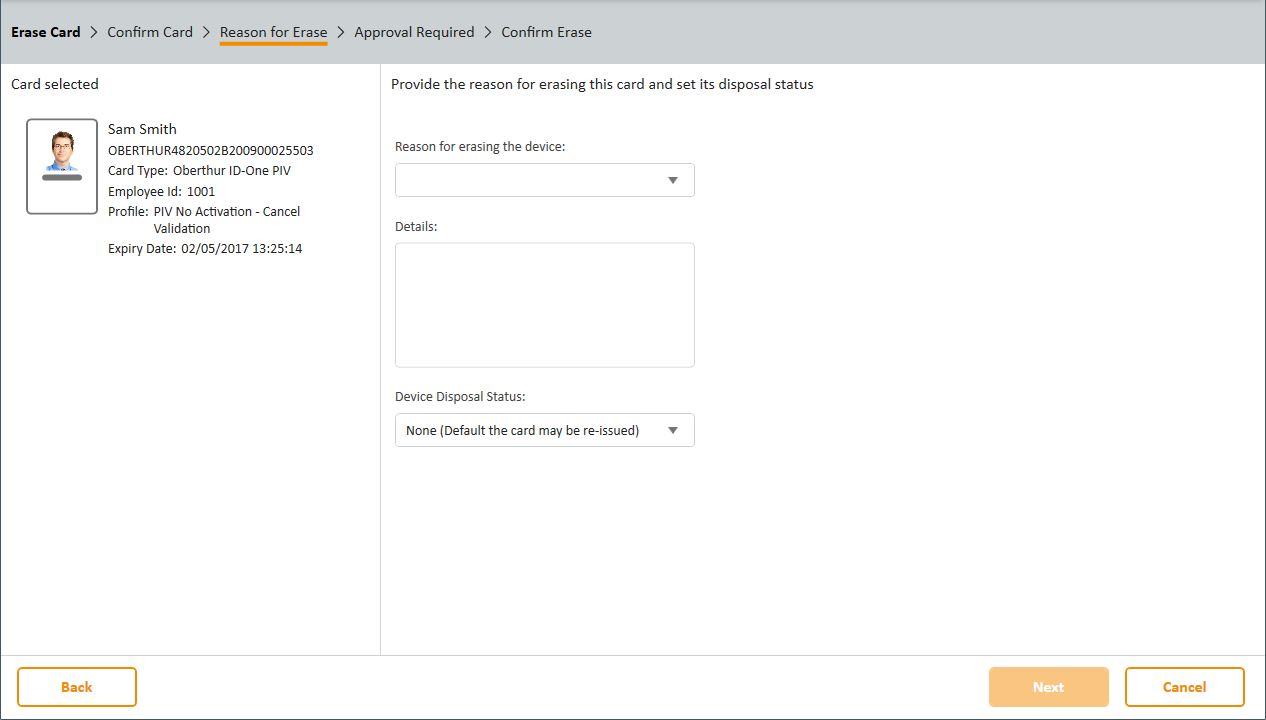
Provide the following information:
-
Reason for erasing the device – select the reason you are canceling the card from the drop-down list. This reason affects how MyID treats the certificates on the card.
See section 6.5, Certificate reasons for details.
- Details – type further information on your reasons for erasing the card. This information is stored in the audit record.
-
Device Disposal Status – select what you want to happen to the physical card after cancellation. For example, you may want to prevent the card from being used again within MyID.
See also the Card Disposal workflow – section 5.15, Disposing of cards.
-
- Click Next.
-
If the credential profile used to issue the card had the Validate Cancellation option selected, you must obtain the approval of another operator before you can erase the card.
- If the approver is present, select Approver Present, click Approve, then ask the approver to insert their card and authenticate using their PIN.
- If the approver is not present, select Defer Approval and click Approve.
Note: MyID does not erase the card if you have deferred approval. Instead, MyID creates an approval job. Another operator must then use the Validate Request workflow to approve the approval job, at which point MyID will cancel the card remotely; this is effectively the same as using the Cancel Credential workflow, in that the card is canceled in the MyID database and its certificates are revoked; the physical card is not affected.
If you still want to remove data from the physical card after it has been canceled remotely, you can use the Erase Card workflow again.
-
On the confirmation screen, click Erase.
MyID erases the card. The confirmation screen details what will happen to the credential and its certificates.
Note: Do not remove the card until the process has completed.
5.11.3 Canceling a credential
If a card is not present,
You can use this workflow even if the card is present; however, the contents of the card are not altered.
To cancel a credential:
-
From the Cards menu, select Cancel Credential.
-
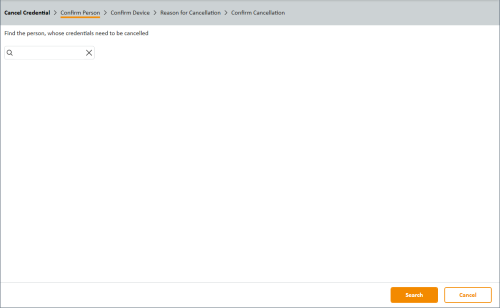
Enter the search criteria for the person who owns the credential you want to cancel, then click Search.
See section 2.2.2, Entering search criteria for details of entering search criteria.
-
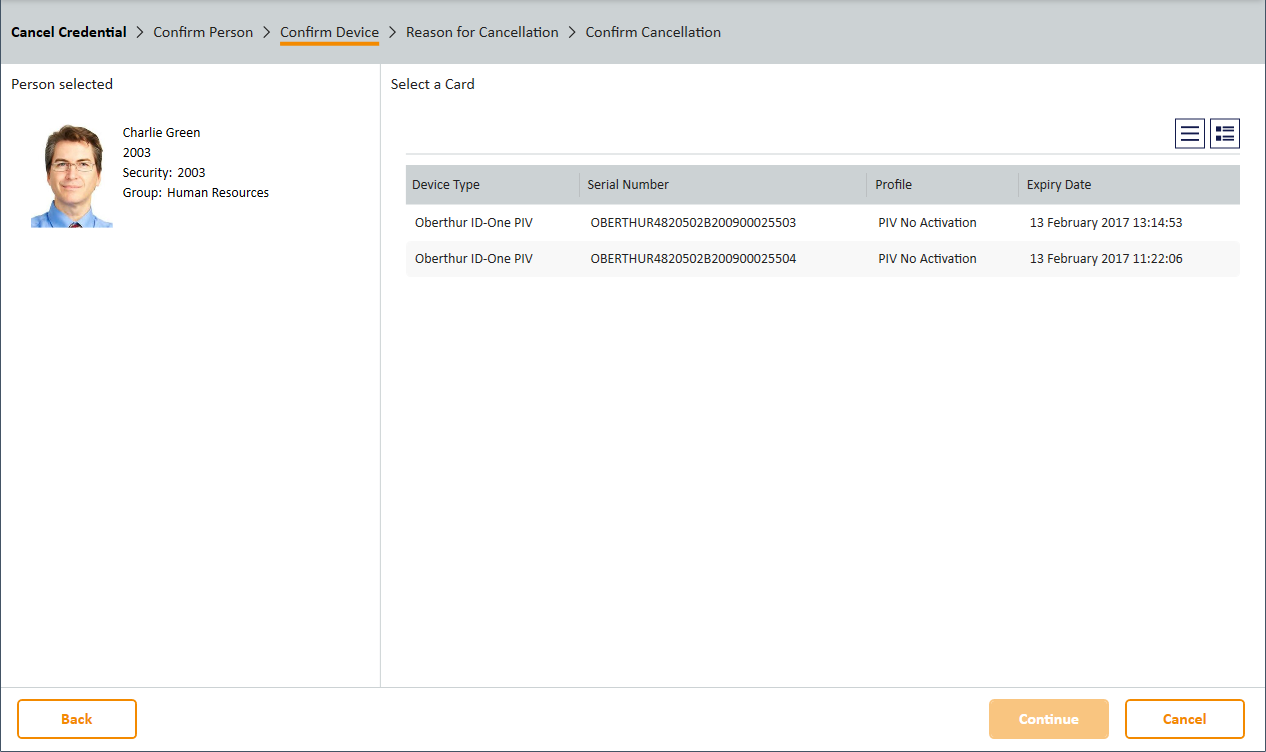
From the list of matching records, select the person to search for any credentials belonging to them.

-
If the person has more than one credential, select the credential you want to cancel from the list.

-
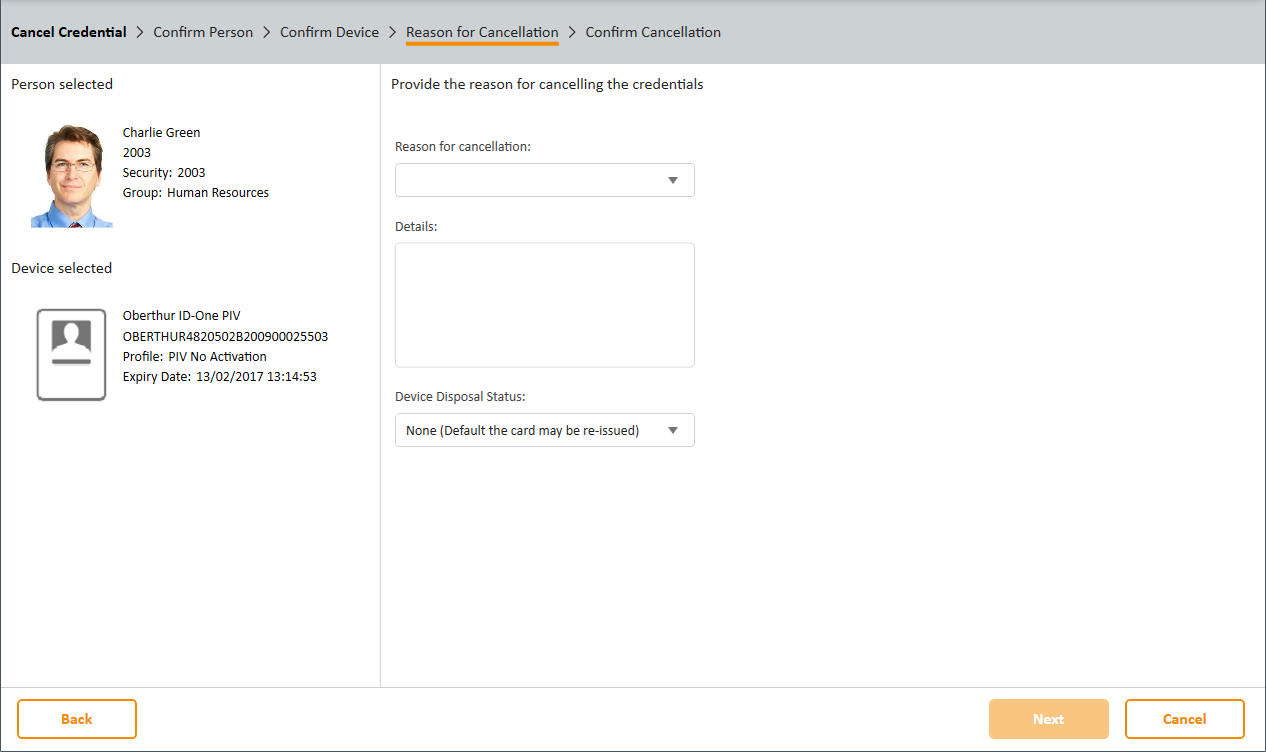
Provide the following information:
-
Reason for cancellation – select the reason you are canceling the credential from the drop-down list. This reason affects how MyID treats the certificates on the credential.
See section 6.5, Certificate reasons for details.
- Details – type further information on your reasons for canceling the credential. This information is stored in the audit record.
-
Device Disposal Status – select what you want to happen to the physical credential after cancellation. For example, you may want to prevent the credential from being used again within MyID.
Note: The Device Disposal Status option is not shown for credentials that cannot be disposed; for example, VSCs.
See also the Card Disposal workflow – section 5.15, Disposing of cards.
-
- Click Next.
-
If the credential profile used to issue the credential had the Validate Cancellation option selected, you must obtain the approval of another operator before you can erase the credential.
- If the approver is present, select Approver Present, click Approve, then ask the approver to insert their credential and authenticate using their PIN.
-
If the approver is not present, select Defer Approval and click Approve.
Note: MyID does not cancel the credential immediately if you have deferred approval. Instead, MyID creates an approval job. Another operator must then use the Validate Request workflow to approve the approval job, at which point MyID will cancel the credential.
-
On the confirmation screen, click Confirm.
MyID cancels the credential in the MyID database, unassigns it from the user, and revokes any certificates as appropriate. The confirmation screen details what will happen to the credential and its certificates.

5.11.4 Validating card cancellations
If you want to ensure that any card cancellations are validated by another operator, you can set the Validate Cancellation option in the Credential Profiles workflow.
- An operator uses the Erase Card or Cancel Credential workflow.
- Either another operator enters their authentication details while the workflow is being used, or the original operator selects the Defer Approval option and the second operator uses the Validate Request workflow to approve the cancellation.
To set the Validate Cancellation option:
- In the Configuration category, click Credential Profiles.
- Select the profile you want to change, then click Modify.
- Click Issuance Settings, then set the Validate Cancellation option.
-
Click Next, then complete the Credential profile.
When an operator uses the Defer Approval option in the Erase Card or Cancel Credential workflow, MyID creates a job that must be validated by another operator before the card can be canceled.
To validate a request:
- In the Cards category, click Validate Request.
- In the Task Type drop-down, select Cancellations.
- Click Search to find the appropriate cancellation requests.
- The workflow moves on to the Validate Request stage. This stage gives details of the appropriate request and provides the option of either accepting or rejecting that request.
-
Either:
- Choose Accept to validate the request, or
- Choose Reject to reject the request, preventing the card from being canceled.